I’m sorry I didn’t share enough recipes with you BEFORE Christmas day, I was so caught up with the supper club that I didn’t focus on the Christmas meal until the day itself! Luckily my wonderful mother had made a schedule after my own heart (I wonder where I get it from) and had planned every meal leading up to the big one. All were absolutely delicious with recipes from Yotam Ottolenghi, Hugh Fearnley Whittingstall and of course, our family’s festive favourite, Elizabeth David.
Every Christmas morning when I was small we had Elizabeth David’s Chelsea Buns for breakfast. Such a treat, we re-ignited the tradition a couple of years ago and although I still leave the cooking of these to my mum, I thought this year I would watch and learn, then re-create the fun back home for all to enjoy! I’ll be making these within the next week so you can all enjoy some new year stodge….but for now, I thought I’d share with you the glories of the pork pie.

I made two of these bad boys for the Festive Feast and they were a) a challenge, and b) a lot of fun.
I borrowed from both the wonderful Nigel Slater and genius Rick Stein for this recipe. The main recipe is essentially Nigel’s but I flipped between the two for tips and alterations.
My Top Tips and Porky Pie Tricks:
1. Make sure you work with your pastry when it is still hot. Once it cools (which happens quickly so don’t dither) it goes solid, unusable and quite disgusting.
2. Make sure there are no cracks or thinner weak points in the pastry. It behaves really well and is malleable enough to avoid this if you are careful
3. Jelly: I was very confused about this. Most recipes call for you to make a pork stock (not. much. fun.) using trotters (you see). These apparently guarantee a jelly but I did not have such easy success. In the end I skimmed and sieved my pork stock and added gelatine to guarantee a set. I did not want to end up with the dreaded ‘soggy bottom’ syndrome with an un-set jelly! This said, I did have a few ‘leaks’ in pie 1 (see point 1!) You must also add your jelly while the pies are still warm (not straight out of the oven hot) otherwise during cooling the pastry and the filling separate and the bottom weakens. Do this while the pies are still in the tin and then leave in the fridge to set completely before gently, carefully and respectfully removing them!
4. Hand cut your meat, don’t buy mince. I know it sounds laborious but it makes for a much more textured bite and satisfying filling.
5. As soon as the pies come out of the oven run a large pallette knife around the edges (CAREFULLY) as the fat from the meat will have surged out of the hole in the top and created an impossible layer of ‘fat glue’ which will stick to the tin. Lovely.
Festive Pork Pies
Enough for 12 very hungry people
You will need 1 x 20cm cake tin with a removable bottom (this is really important otherwise getting it out is going to be impossible!)
Stock
Pork bones (just ask your butcher for about 1kg)
2-4 pig’s trotters
1 onion
1 carrot
1 small bunch of parsley stalks
1 rib of celery
a smattering of black peppercorns
Pie Filling
1kg boned pork shoulder
250g pork belly
250g streaky bacon
2 sprigs of thyme
2 sage leaves
½ tsp ground mace
½ tsp ground white pepper
2 good pinches ground nutmeg
Pastry
200g lard
220g water
575g flour
1 beaten egg
First make your stock (I suggest doing this the day or at least several hours before to test its jellification level… New word coined here at annascafe, a pretty fine one I think).
Put everything in a large pan and cover with water. Bring to the boil and then turn heat down to a simmer. Keep an eye on this, pork stock generates an unsavoury amount of SCUM which you must religiously remove. Keep this simmering for 3 hours. Then strain the stock through a sieve and return to a clean pan. Now boil it vigorously until it has reduced to 1 pint.
Now to test it’s jellification capabilities. Put it in a clean jug and into the fridge. Keep an eye on it. It should set to jelly within about 3-4 hours (but for safety if you have time, leave it overnight). If it does, SUCCESS. You can reheat this to liquid again when you are ready to fill your cooked pie. If not, never fear. When your pie is ready to fill (and ONLY then) use a leaf or a sachet of gellatine (according to pack instructions for quantity. 1 sachet normally = 1 pint) Re-heat your reduced stock then follow pack instructions to make a jelly. You have to use this instantly so don’t do it until you are ready to fill the finished pies!
Now prepare your meaty filling.
Filling
Roughly chop all your meat into very small dice. It takes time but is worth it for the end result. (If you really can’t be bothered chop half and then roughly chop the rest into large chunks and whizz in a whizzer aka Magimix or similar).
Strip the leaves off the thyme and finely chop your sage.

Now get a really big big bowl and add all the herbs and spices then the meat and mix it all together using your hands until it is well combined. Shape it into a rough ball and set aside and make your pastry.
Pastry
Pre-heat the oven to gas 3 (160 degrees)
Be prepared to move fast now because as soon as the pastry is ready you have to work with it.
Grease your tin with butter and then dust it all over with flour. To get a good even coverage put a tablespoon of flour into the tin once greased and then rotate the tin while tapping it to move the flour all over the surfaces. Discard any leftover flour.
Get a large board and rolling pin ready and dust both with flour. Keep a little bowl of flour to hand.
If you want to decorate your pie, get your pastry cutters out too.
Now for the main event:
Heat the lard and water in a pan (watch out, this is a bit smelly!)
Sift the flour into a large bowl and add a good pinch of salt.
When the the lard and water have come to the boil remove from the heat and pour into the flour.
Stir with a wooden spoon until combined (it will be a bit gravelly to start).
Once combined, the coolness of the bowl should have made the pastry cool enough to handle so now get your hands in and combine the pastry into a ball.
Pull off 1/4 of the pastry to make your lid. Leave it in the bowl in a ball so it retains its heat.
Put the rest of the pastry straight onto your floured board and roll out to a circle about 4-5cm bigger than your 20cm tin (try to keep this neat so you get an even thickness).
Now lift it very gently and drop into the tin. You can now push the pastry using your fists up the sides of the tin (if it slides down it is still too warm so wait a bit and try again). Don’t make any holes. It is a malleable pastry so it does not easily tear. DON’T PANIC!
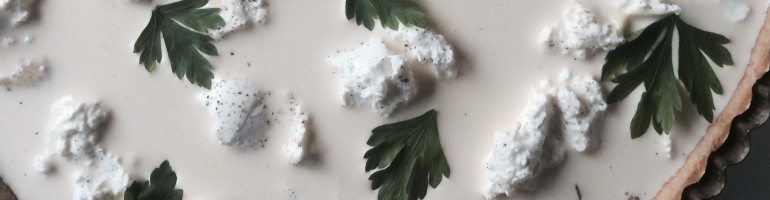
Leave about 1-2cm overhanging (if there is more trim it and keep the trimmings) then add your meat and tuck it in (see pic below). It will fit SO neatly you will automatically feel that all is well. It is.

Now roll out your lid to roughly the same size of the top and trim it so it has a neater edge (keep your trimmings!) and cut a hole in the middle for steam to escape (I returned my cutter to the hole while it cooked so it kept its shape (you could use a metal piping nozzle or just make a slit with a knife if you don’t have mini pastry cutters, because let’s be honest, who does except me).
Lightly brush the top edges of the pastry with beaten egg and drape the lid over and crimp. I just went with it so sadly don’t have any useful pics of this stage… I used my left thumb against the edge of the pie and then pushed against it using my right thumb and forefinger to create a seal. (make sense?!) You just want to make sure that the two edges are together and not afar… they will happily meld because of the heat and the structure of this pastry. Just squish until closed, is the essential instruction.

Now you can relax. You’ve done it! Gather up and roll out your trimmings (it doesn’t matter now if it is cooled, it will be stiff but it’s just decor so no need for flexibility here) and cut out anything you fancy and stick on with a bit of egg wash (you’ll need the rest of it later).
Now put it in the oven for 90 minutes. Keep an eye on it and if it is browning too much put a foil hat on it.
When the 90 mins is up take the pie out and lightly and evenly brush it with the remaining egg wash and return to the oven to brown for a further 30 mins. Some of the pork fat (or a lot of it) will have escaped. Don’t worry, it just adds character and colour (cos I said so, and I have no idea how you might stop this happening!)
Run your pallette knife around the edges to make sure it isn’t sticking and leave the pie to cool for at least an hour.
A little truth: I did not follow my own instructions as they read below but am writing them here as I think they will work better, for good reason. I removed my first pie from the tin when it was cool and then left it a while before adding the jelly. This resulted in the pastry at the base losing it’s really crisp outer layer so suffered a soggy corner on this pie (shock, horror). The other pie, however, was perfect as I added the jelly as soon as it was cool and didn’t wait. The method below (adding jelly while the pie is still warm and leaving it in the tin while doing so) should alleviate any soggy problems because of the texture within the pie (imagine a hard outer crust and a softer inner with a natural fat barrier) should hold the jelly in whatever. However I’m afraid that I can attach no guarantee to my theory…
Now re-heat or add gelatine to your jelly, and pour into the hole in the top of the pie. Use a funnel for this or a really good pouring jug (depending on the size of the hole you made in the top)
Leave until completely cool then put in the fridge overnight.
In the morning very gently wiggle the pie out of the tin (it is a robust creature so don’t worry) and serve cold with pickles, (gherkins, chutneys, pickled walnuts) a strong cheddar cheese, a glass of ale and plenty of new year joy!

Post Script: If you DO suffer a soggy bottom, don’t despair it will taste amazing anyway and you will enjoy immensely (as I did) the chorus of ‘ooooooohhhhhhhhs’ and ‘aaaaaaahhhhhhs’ that people will emit when they see the pie. A crowd-pleaser and no mistake.


Anna very good recipe, well written with loads of attention to detail too often left out by other cooks.
I have had the pleasure of tasting this and it was fantastic.
I would love to make it but with my clogged arteries I have to look and fantasise.
Only thing I would add is some people may require a little salt even with the bacon in recipe.
Salt eh… arteries eh…?! Yes maybe salt should be added for those with a weakness for sodium (or just don’t forget to put it out on the tables at supper Anna? Sorry again N!)
And I agree, with a recipe like this you need the details, it’s not for the faint hearted but certainly possible for even the most basic of cooks if you’re feeling adventurous!
Anna, this is an absolutely brilliant read. I mean, I don’t think I’ll EVER make one of these, but I’ll re-read this post often.
Yay. Thanks D… I have actually edited it a vast amount since posting… there are a few additions I think you’ll enjoy. So I expect you to read it again RIGHT NOW! and feed back x HA!
Pingback: Feasting, Scrooge, and a Christmas Party | annascafe
You’ve got this vegetarian eater wanted some Pork Pie currently… 🙂 BEAUTIFUL job, Anna!
Thanks Cara! You can make a vegetarian version of the pastry (see the Rick Stein recipe link) and maybe fill with a mushroom pate or some kind of cheesey deliciousness? We should try it out!
I most definitely will!!! xo
haha, at first when I saw the picture, I thought it was a cake, but there’s meat inside. Great idea, once I definately have to try it, but it requires a lot of time, doesn’t it?
Not a huge amount of time, but patience is needed. It’s not something you can rush that’s for sure! The most time consuming bit is chopping the meat, but you can reduce that by using a food processor to chop half and then dice the remainder by hand. Pastry is very quick! Thanks for dropping by!