Category Archives: Bread

Hot Not Cross Buns

Happy Easter everybody! Yesterday I made the traditional Easter treat: hot cross buns. I left the cross off. Secular Buns.
There is simply nothing more satisfying than making a tray of buns. I’m not so good at bread or cakes but buns, buns I can do. Straight out of the oven they are soft, spiced, covered with a sticky spicy glaze and in their neat little rows. Nothing quite like a bun. I’m about to have one (or two) for my breakfast…

This recipe is from Elizabeth David (the same book listed here with my post about Chelsea Buns). It’s lovely. I’m writing this quickly so you can all have a bash at them today or tomorrow… go on. You won’t regret it. Just remember to leave at least 4 hours. Both rising times are about 2 hours so if you want buns at tea time, start at 11ish… you’ve got an hour now to go and find the ingredients.

Hot Cross Buns

450-500g strong plain flour (I used the full amount. It will vary according to the flour you use, your local climate, just follow your fingers. I’ll describe how mine was as closely as I can)

30g fresh yeast (or dried equivalent)

125g currants

1 tablespoon salt (since first publishing this post my trusty recipe testers have queried this large sounding amount… I used Maldon sea salt flakes, a flat tablespoons worth. If you are using finely milled salt you should reduce this by half to avoid a savoury bun)

280ml milk, warmed to blood heat (put about 30ml aside. You might not need it all)

60g soft light brown sugar

60g butter

2 teaspoons mixed spice

2 eggs

Glaze:

25ml water

25g caster sugar

1/2 teaspoon mixed spice

First cream your yeast. Use a little of the warmed milk from the 25oml to activate the yeast. Just pour it over and wait for it to go creamy or if you’re using dried, foamy.

While the yeast is creaming combine (in a warm bowl if you can manage it) the 450g flour, sugar salt and spice. Mix it together with your hands and make a well in the centre. If you need the further 50g flour, you’ll add it later.

Add your butter to the warmed milk so it completely softens. Now add the 2 eggs, beaten (I didn’t do this and it was hard to properly break them up once they were added to the flour)

Pour the yeast into the flour and then add the milk, eggs and butter.

Bring the dough together with a wooden spoon. It will be very sticky! Make sure to combine all the ingredients. This is not a dough you can really lift or touch easily. I used a spoon the whole time as it was just to sticky to handle.
Now add the currants and fold them through the dough thoroughly.

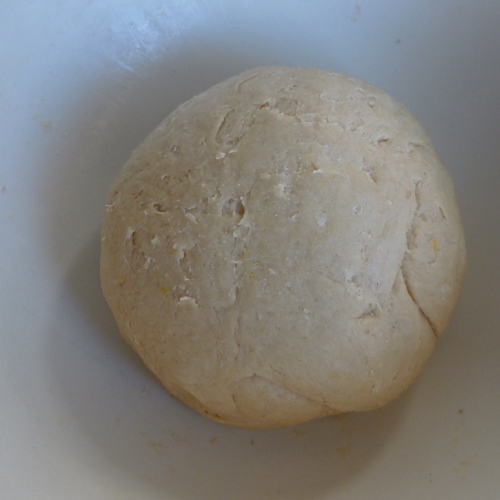
I used the full quantity of flour at this point as my dough wasn’t coming together properly but rather sticking in strands to the spoon and the side of the bowl. You want it to hold together. Look at this picture to see what it was like in the end after the remainder of the flour was added:

It’s still sticky, but happily sits together.

Now it needs to prove. Cover your bowl in cling film and put it in a very warm place. Elizabeth David recommends steam to help it along (not sure where you’d find this) and Dan Lepard even suggests a very low oven to kick start the process. Spices make yeast lazy so it’s not quick. Mine took around 2 hours to double in a very warm room wrapped in a tea towel next to the radiator.

Prepare your bun tin. Grease a large baking sheet and then coat it with flour. Tap the edges of the tin to fully and evenly distribute the flour all over it. You don’t want your buns to stick… you want to get them out quick so you can stuff them in your mouth!

Once the dough is double it’s size very generously dust a surface and your hands with flour. Sprinkle more flour onto the dough as you pull it away from the edges of the bowl. It won’t really want to come out but show it who’s boss.

Drop the dough onto your floury surface, flour your hands again and knead it briefly to bring it together. It feels so lovely at this point and it smells delicious.

Now divide your dough into 16. Elizabeth David says it makes 24.. but I don’t know how. I use a very sharp knife (which I also coat in flour) to slice the dough into equal sized pieces.

Shape your pieces into rounds. I improvised at this point, you just want a tight little ball.

This is where you would normally make the cross cut in the top, which is the traditional way to treat these buns. If you do this, they will not rise high but spread. If your dough is too soft and sticky they may not do much of either. If you’d rather do a pastry cross use Dan Lepard’s recipe here. In fact, his whole recipe looks pretty nice, I might try it next time…

Line the buns up in your bun tin evenly spaced apart and now it’s time for prove number 2. Lightly oil some cling film and place it over the buns. Leave them in your warm place again and let them double again

When they have risen, pre heat the oven to gas 5/6 and cook for 15-20 minutes.

While they are cooking heat the glaze ingredients in a pan and boil until it becomes syrupy.

When you get the buns out of the oven brush them with the glaze and lift gently onto a cooling rack.

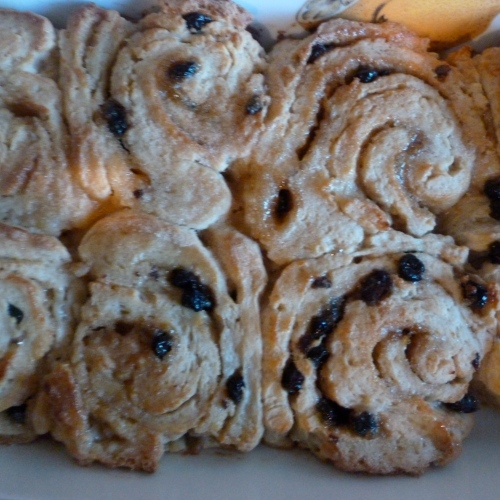
Some of them will have stuck together in satisfying little lines and you’ll have to prize them apart and get your fingers all sticky to split them open and spread them with butter. An absolutely wonderful indulgence. I highly recommend you take the time to make these as there really is nothing better than buns.

*****

Phil, I made these buns for your birthday but now you are ill. Get well soon and I’ll make them for you another year!

8 Comments

Filed under Baking, Bread, Breakfast, Cake, Fruit, Recipes

A Sourdough Day

For most people Sunday is used as a day of rest and relaxation; put your feet up and have a cup of tea and a biscuit. For me, I want to be brewing the pot and making the biscuits. Last Sunday was no different, I invited a friend over for a day of sourdough experimentation! I’d spent the week nurturing what became affectionately known as my ‘alien baby’ otherwise known as a sourdough starter.  Here it is in all it’s bubbly fermented glory!

To start this off, I used a San Fransico sourdough culture bought for me by the same dear friend who came over to help. This was to be mixed with strong bread flour and water and then fed every day for a week. Some of the instructions were baffling “Leave your starter in a warm place between 80 and 90 degrees” even in fahrenheit this is outrageously warm for a February (or even mid summer!) in London. I put it by the boiler and hoped for the best. I nurtured this creature for a week, feeding it every day with flour and warmed water, stirring it, sniffing it, until it reached this very alive and yeasty stage.

The next part of my story is less successful. I’m sharing it with you because the starter gave rise (no pun intended) to a really excellent day of eating, cooking and catching up with a great friend and because the starter was such a bubbly success I just had to show you… the bread, alas, was not so successful hence why no recipe is included. I’ll wait until it’s fool proof.

We discovered early on that not only does the starter take an awfully long time to prepare, so too does the bread itself. Most recipes I found started at 8.30 in the morning and then had half an hour timed instructions through to 6pm! We thought the hard part was over with the starter, no such luck. Eventually we found a recipe that was more to our liking, mainly because it appeared not to take as long as some of the others. It did however, seem a bit untrustworthy, the fellow who wrote it was a shifty looking character and the instructions were a little hazy which is not a good sign in a bread recipe. Despite this we ploughed ahead and created a lovely sticky dough

We then had to knead it for 15 seconds, then rest for 30 minutes. Yes that’s right, 15 seconds – 30 minutes. You repeat this step over many hours increasing the resting time each time. At one point you swap from the mini kneads to a stretching and folding routine. Our dough was really rather nice, soft, floppy, warm and glutinous maximus! When tipping it out of the bowl, it hung on for ages, stretching it’s gluten enriched strands down towards the table in a most satisfyingly alien manner. Unfortunately I didn’t get a great picture of this because by that time, it was getting dark.

To relieve ourselves of the monotony, we decided to throw together some lunch. I, of course, had originally thought we could have warm bread and cheese, but new plans had to be made. It was a typical Sunday in our fridge, the ends of the week’s shopping and vegetable box hung around waiting for inspiration. There would be a number of things that were off limits as they had been reserved for supper and on this particular Sunday this left very little to play with. With the familar cry of “pasta?” in the air, we foraged until my friend in a flash of inspiration said: “Pasta Con Le Sarde?” After living in Venice for many years, she is very good and seeking out what I cannot when looking at an empty fridge. OBVIOUSLY I did not have any fresh sardines just lying around, but we had most of the rest of the ingredients and to be honest, it was delicious. I can’t wait to try it with the sardines!


Pasta Senza Sarde (Pasta Without Sardines)

200g mini orzo pasta

5 anchovies

2 cloves of garlic finely sliced

2 large fresh tomatoes, roughly chopped

30g raisins

Parsley, roughly chopped

Parmesan to serve


Cook your pasta according to instructions…meanwhile…

Warm a good slug of olive oil in a pan and add the anchovies to melt, slowly on a low heat.

When they have broken down and are smelling lovely add your garlic, raisins and tomatoes and cook slowly until the tomatoes are beginning to break down and the raisins have puffed up a bit

When the pasta is cooked, drain it, loosen it with olive oil, and stir it through the fishy tomatoes, add the parsley at the last moment and serve with Parmesan. Eat with a spoon!

A proper recipe for this, with the correct additions of white wine, fennel and saffron (and of course sardines) can be found here. I’m certainly going to try it.

After lunch we braved the bread again, this time stretching then folding the dough into thirds and then leaving it to rest, again and again…..

It was a very lovely dough. It certainly felt as though it was going the right way… But then, who knew? We were just persevering with the ever complicated recipe and hoping we were on the right track.

The bread making left quite a lot of room to do other things so I decided we needed something sweet. Tea time was fast approaching and the bread was far from ready. Oatmeal and Raisin Cookies were the decided treat and I set about it.

The recipe I used is one from the lovely food blog Smitten Kitchen

These aren’t really a chewy cookie, they are more of a soft tea time mini bun. Tom is insistent that they are rock buns. I will continue to call them cookies because that’s what they appear to be. In reality, he is probably right.

The reason I like this recipe is that it is ridiculously quick. Butter, sugar and an egg are combined in the whizzer, then flour cinnamon and salt are added,  oats and raisins are mixed in at the end and then you simply put dollops of the dough on a tray, chill for 10 minutes then cook for 10 minutes. Excellent and all ready in half an hour.

I like to make mine really small, about a teaspoon of dough per cookie. It is a very good idea to chill them for 10 minutes in the fridge first as they probably have a tendency to spread like mad if you don’t.

I haven’t reproduced the recipe here as it is in full and good order at Smitten Kitchen. If you don’t have American weighing cups, I recommend you get some. They make this sort of cooking so much easier and are very satisfying. Translating recipes from cups is pretty difficult as you can imagine: think of a cup of flour, a cup of dark brown sugar and a cup of walnuts, these are not going to all weigh the same.  Next time I make these, I will weigh each thing and write it down and share it if you really want. But until then, buy some cups.

So after our tea time treat we went back to the bread… Evening was fast approaching and my dear friend was getting tired, she left me with the dough and went home for some well earned rest. I soldiered on with the dough, stretching, folding and resting (I was resting too, 30 minutes of series 1 of ER then back to the kitchen)

As it was now dark I thought I’d better start on dinner so with the remaining bits and bobs in the fridge I whipped up a potato curry. And jolly nice it was too. It was influenced by an Ottolenghi dish and some general online curry recipes.

Potato Curry

1 tbsp cumin seeds
1 tbsp coriander seeds
6 cardamom pods
½ tsp ground turmeric
1 tsp paprika
1 tsp ground cinnamon

700g potatoes, peeled and quartered
200g carrots, peeled and quartered
2 tbs vegetable oil
1 tbs black mustard seeds
1 onion, sliced thin
5cm piece ginger, peeled, grated
1 green chilli, seeds removed, chopped
2 garlic cloves, crushed
5 or 6 curry leaves
1 tin of good chopped tomatoes
125ml coconut milk


Toast the coriander and cumin in a pan until they start popping

Transfer to a pestle and mortar and grind them up with the cardamom until they smell wonderful. You can throw away the cardamom skins when the seeds are released

Heat the oil in a pan and add the onions, fry until soft then add all the spices, ginger and mustard seeds and stir to gently cook them. Now add the chilli, curry leaves, garlic, carrots and  potatoes and mix the while lot together until the potatoes are turning yellow with the turmeric.

When everything is smelling wonderful, add the tinned tomatoes and coconut milk and leave it to putter away on a low heat with the lid on for a good hour.

Check on it after this to make sure the potatoes are cooked, then when you are ready to eat, re-heat with the lid off for another 30 minutes.

You could do all this in the oven too if you were so inclined.

I desperately wanted to make Naan bread to go with this but we didn’t have any yoghurt and I still needed to focus on the sourdough, which was gently mocking me from a corner of the room.

Finally it was time to shape the dough. Last year I went on a bread baking course at the wonderful Lighthouse Bakery School. It was such a fantastic day, I highly recommend it. In fact my bread lesson companion was the same as my sourdough buddy, but unfortunately she had long since gone home and so the shaping lesson we had listened so intently to at the Lighthouse was left to me alone to re-create. One thing that really stuck from that day was the lesson not to knead your dough with flour. Instead we were taught to wipe a light layer of olive oil onto the surface, this keeps the dough from sticking and doesn’t add a new component to the dough. Kneading with flour means you ruin the delicate balance of ingredients.

Another important lesson was how to shape the dough using it’s own elasticity, stretching the dough so it forms a ‘skin’ on the top.

You do this by pushing the dough away from you and then folding it back on itself. You do this around 6 times turning after each fold so you have created a taught top (which will be facing down). It still looked like an alien.

To be honest, I knew this was where things would start to go downhill. The recipe I followed only called for one shaping of the dough. A sourdough has an extremely high water content and it spreads if you leave it for even a minute. I think this dough needed 2 shapings.
This is a pretty interesting video. I like how she calls a Boule a Boo-lee!
But it gives you an idea of how crazy this dough is. It runs away from you!

So to cut a very long story a little shorter, I shaped my dough, slashed it and left it to rise one more time and then I put it in the oven for the suggested 40-50 minutes…


And I burnt it.


That’s right. After a whole day of labor, I burnt the bugger.

And the slashes sealed up on the top leaving me with a huge round black bomb! OK it wasn’t too bad, the top was VERY crispy but it wasn’t totally ruined. The lovely open texture I was hoping for after all that work, was only evident in the top third of the loaf (due to the slashes disappearing I think). Something went very wrong, I am yet to discover what. I think what is needed is a whole lot more experimentation, but really… who has the time?!

Luckily by this point Tom had come home and had brought some raita with him to eat with our potato curry. We sat down and ate while I mourned the death of a loaf… But we still had warm slices of it for pudding with butter and plum jam… And really, who cares if you make a big baking mistake, it’s all learning and you never know, I might get it right one day and until then, we’ll eat it warm with butter and jam and pretend that’s how it’s supposed to be.


2 Comments

Filed under Baking, Biscuits, Bread, Curry, Lunch, Pasta, Quick, Recipes, Supper, vegetables, Vegetarian

Elizabeth David’s Sugary, Spicy, Sticky and Square Chelsea Buns

‘There’s a charm in the sound, which nobody shuns
Of smoking hot, piping hot, Chelsea Buns’

                                           Eighteenth century song

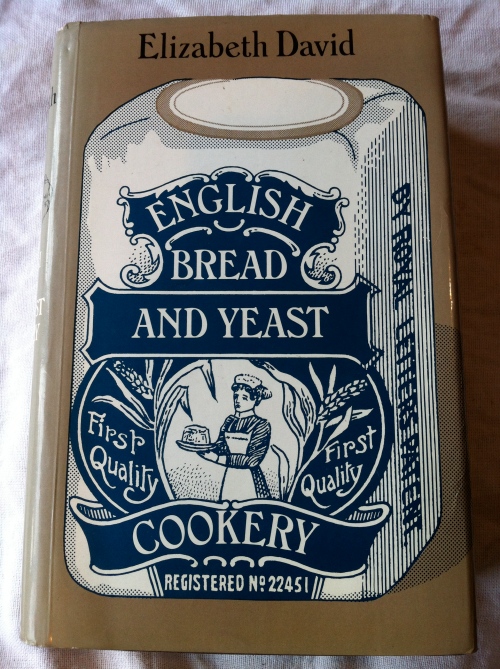
Reading Elizabeth David’s English Bread and Yeast Cookery is like visiting the most eclectic bakery you can imagine and being given a taste of every development in British baking from the middle ages to the modern day. As she rolls out the history of every bun, cake and bread,she puts them in context, describing where they came from  and  how they were  invented or discovered. The book I have was bought for me by my mum and for me, is the ultimate guide to bread and yeast cooking.

This book is amazing. Sometimes it takes a few goes to actually get a grip on a recipe and it always takes a couple of thorough readings, but because they are such a joy to read, this is no bad thing. That said, they are not always the easiest recipes to follow, for example the recipe for Chelsea Buns tells you to follow the method for Bath Buns on the previous page which is rather confusing when they contain different ingredients in different quantities! However, my first batch of Chelsea Buns turned out exactly as I remember them, therefore, exactly as they should be.

Before we begin, I’ll pay homage to the great Elizabeth David by filling you in on the history of the wonderful and decadent and apparently ‘friendly’ (according to my friend who assisted with the baking) Chelsea Bun, in her own words. Hopefully this excerpt will whet your appetite to go out and buy this lovely book and explore it for yourself. It certainly makes me want to open a cafe in the style of the wonderfully described Chelsea Bun House…

“The famous Bun House of Chelsea was probably build towards the end of the seventeenth century or in the early years of the eighteenth. It was a large establishment, situated near Sloane Square in what was then Jews Road, later the Pimlico Road, and within easy reach of the river. Evidently a bakery, pastry cooks’ and refreshment shop combined, the Bun House provided tables at which the customer could sit down and eat their cakes and buns fresh from the oven. In its early days the Bun House was renowned chiefly for its hot cross buns, sold in massive quantities on Good Fridays and during Easter celebrations, when great crowds flocked to Chelsea expressly to visit the Bun House. Caroline of Ansbach, Queen of George II, was a frequesnt visitor to Chelsea during the early years of the reign (he succeeded in 1727) going there by water –  tradition has it that she, her family and the King himself visited the Bun House on many occasions. Possibly, then, the popularity of the Chelsea bun , as distinct from the older and more famous Good Friday buns, dates from the days of Hanoverian royal patronage, although already in the days of Queen Anne, Swift, staying at Chelsea for a change of air, reported to Stella how ‘Rrrrrrrare Chelsea buns’ were cried in the streets, and how the one he bought for a penny was stale adding, not surprisingly, ‘I did not like it’ (1) [This exchange refers to Jonathan Swift, author of Gulliver’s Travels among many many other things, and ‘Stella’, real name Esther Johnson, who was his student, the daughter of a servant of a friend of Swift’s and they remained in rather ambiguous contact for the rest of Stella’s life.]
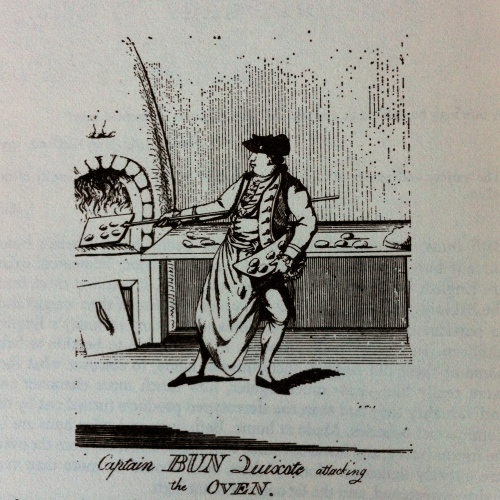
A century after Swift’s brief stay in Chelsea, the Bun House was still flourishing. For four generations it was in the ownershp of a family called Hand [see illustration below] and according to Chamber’s Book of Days ‘families of the middle classes’ would sill walk a considerable way to taste the delicacies of the Chelsea Bun House (2). Demolished in 1839, the original Pimlico Road Bun House was re-created in Sloane Square for a brief period in 1951 as part of the Festival of Britain celebrations.

For four generations the Chelsea Bun House belonged to a family called Hand. One of them became an officer in the Staffordshire militia. Inevitably he was nicknamed Captain Bun. From a print dated 4 January 1773; Chelsea Public Library

‘It is singular’ wrote Sir Richard Phillips (1), an addict of the original Chelsea buns, ‘that their delicate flavour, lightnedd and richness, have never been successfully imitated… for above thirty years I have never passed the Bun House without filling my pockets’
Sugary, spicy, sticky, square and coiled like a Swiss roll, the Chelsea bun as we now know is a pretty hefty proposition. That it can be very usefully adapted to smaller scale needs was demonstrated to me in the letter quoted further on. So it worth knoing the principle on which Chelsea buns are made. Recipes vary considerably in details, the but the basic bun dough is fairly constant…”

1. Journal to Stella, 2 May 1711
2. Chamber’s Book of Days, Volume 1, 1869 *

So now we can proceed with the recipe, but in my own words…

Chelsea Buns

Dough

550g flour

2 eggs

225g butter, softened

150g milk

15g yeast (or  1 sachet of dried yeast)

Grated peel from 1 lemon

1tsp cinnamon

1tsp salt

2tbs sugar

Filling

85g currants

85g butter

85g soft brown sugar

85g castor sugar

1tsp cinnamon

Glaze

1tbs milk

2tbs castor sugar

First make the dough:

Warm the milk very slightly in a pan and then pour a little over your yeast in a bowl. This activates the yeast and should make it bubble a little and become smooth. If you are using dried yeast, it will dissolve and become silky.

Mix the salt and sugar into the flour then rub the softened butter into this mix until it resembles breadcrumbs (rather like when you make a crumble)

Add the creamed yeast, eggs,  milk, cinnamon and lemon peel and mix to a light dough. I would add the milk in increments until you have a stiff-ish dough that isn’t sticky. (If you are going by my mum’s description, it needs to look like a baby’s head! We always affectionately pat the ‘baby’ when it is ready…It makes a fat little sound: ‘plap plap’)

Now cover the bowl with cling film and leave it in a warm place for about 1 1/2 hours until it has roughly doubled in size. It’s quite a slow process with this dough, especially if you’re making it in winter so don’t be afraid to leave it a little longer.

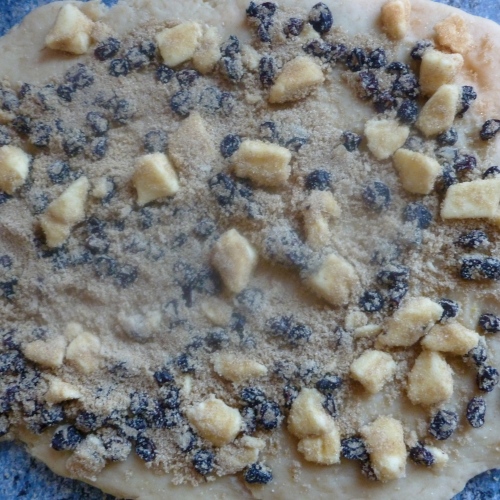
While it is rising mix together the currants, sugars, and butter (cut into little pieces) to make the filling you do not want to combine the sugar and butter, but have each thing separate (see picture below)

When the dough is risen well, punch the dough down and then knead it well for about 5 minutes. I do this in the bowl but you can do it on a surface, just try not to add any extra flour as this will stiffen the dough.

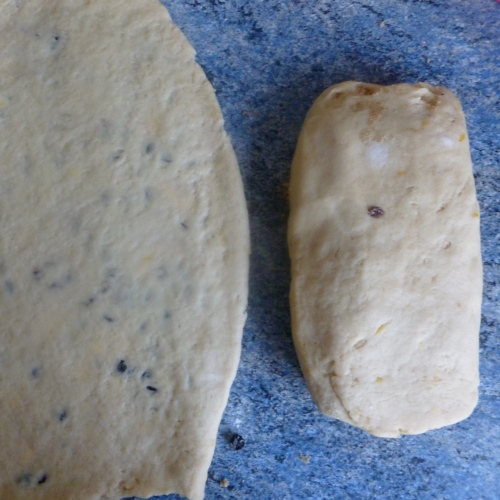
Now divide the dough into 2 equal portions and roll each into a rectangle about 20cm x 30cm (it is important to try and keep them fairly square, I had trouble doing this but have a bash.

Sprinkle the filling over the rectangles, spreading it as close to the sides as you can

Now, fold the filled dough rectangles into 3 (as your would for puff pastry if you have ever made that) up from the bottom along the longest side so you have 2 short sausages. Seal the edge with a bit of milk or water and press together. Then give it one turn and roll the dough out again to roughly it’s original rectangle size

(can you see the smear of butter on my camera lens in these pics?!)

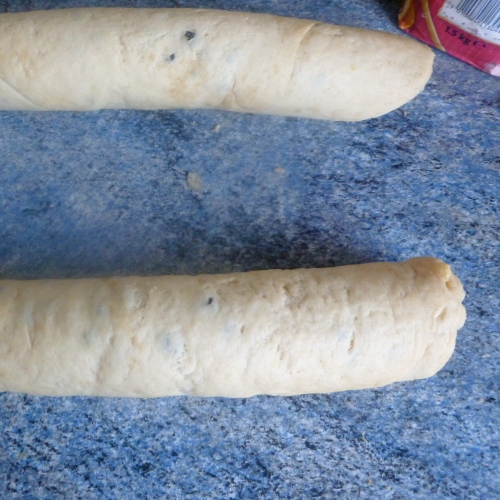
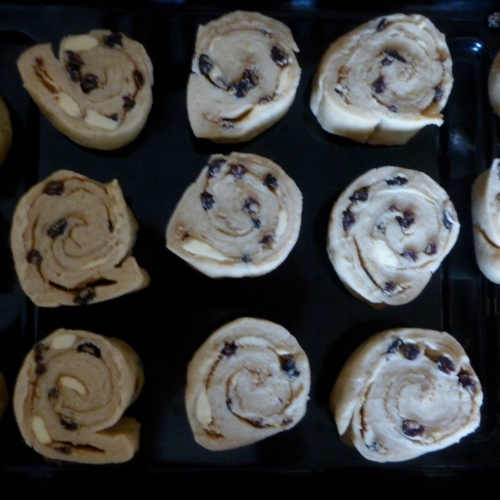
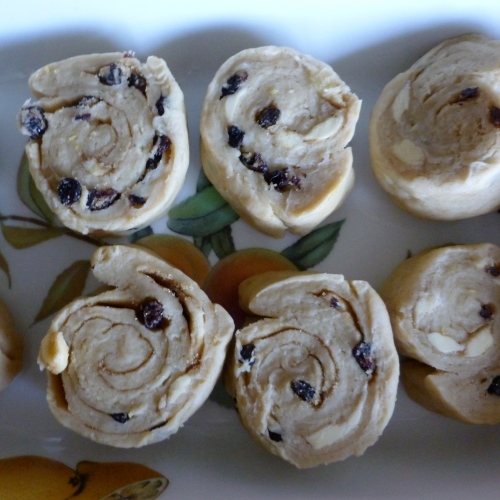
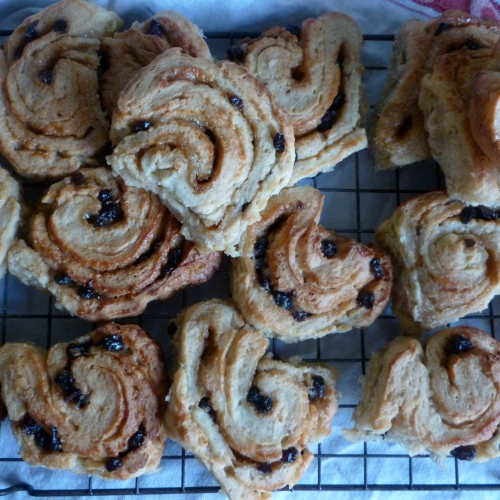
Now you make the final roll. Roll the dough up firmly along the shortest side (as you would a Swiss roll if you have ever made that) so you have 2 long sausages, seal the edge again and turn it over so the seal is on the bottom. (I forgot to seal mine so the square shape was a bit undone once they were baked, never mind, see pics below)

Now cut the sausages into your buns around 4cm thick (you can actually make them as small or big as you like but remember once they have proved and cooked they will be approximately double in size)

Arrange your buns in a greased dish or 2 (seven to a row used to be the rule of professional bakers) with about 4 cm between each bun. The spacing is important, for during the proving period the buns grow in size and move together assuming their characteristically square shape.. I didn’t leave quite enough space as I had so many (about 26 I think) and not enough tins! It didn’t seem to hinder them too much…

Now leave them to prove with cling film over the top in a warm place, until they are all but touching (probably around 45 mins but keep an eye on them)

Pre-heat the oven to 220 degrees or gas 7

When they have proven, sprinkle them with castor sugar and bake them for 15 minutes. during the baking, the merging process is completed. You want them to be golden brown and soft to the touch

Make the sugar and milk glaze by warming the milk and sugar in a pan until the sugar has dissolved

 When they come out of the oven brush them with the glaze.

Leave them to cool for a couple of minutes then separate them with a knife and put on a wire rack. They are truly amazing eaten still warm, even hot. They are so soft, so sticky and fragrant you’ll probably eat them all in one sitting but make sure to invite some friends over and munch with a cup of tea while everyone goes silent. When there’s a warm Chelsea bun in the room, on your plate, in your mouth; nothing else matters.

They keep well in an air tight tin and can be quickly re-heated in a hot oven for a couple of minutes. They are perfect for breakfast.

The ‘letter’ Elizabeth David refers to in the excerpt above is a lovely thing, taken from correspondence she had with her lifelong friend, the painter Arthur Lett Haines with some incredible sounded alterations to the Chelsea bun which I really want to try:

” [He] always had interesting and beautifully imaginative ideas about food. He writes “I like Chelsea buns. But find them rather large and bucolic [Surely not?!]. So make them very small, exaggerate the quantitiy of fruit, chopped small, and serve them no larger than big petit fours, coated with Royal icing.
1. lemon-flavoured and peppered with a crushed pistachio
2. Royal icing flavoured with angostura and sprinkled with poppy seeds’
Now that seems to me a most admirable approach to the problem of re-creating a speciality which would otherwise have little place in our lives today” *

Now Elizabeth David, that is one thing we disagree on, I cannot imagine a world where the Chelsea bun would take a little place in my life today and I encourage everyone to disprove her theory.

*Excerpts from Elizabeth David’s English Bread and Yeast Cookery, Penguin Books, 1977, pg474-484

9 Comments

Filed under Baking, Bread, Cake, Christmas, Pudding, Recipes